
by Penny Angeles-Tan | Jan 23, 2021 | Bon Appetit
Someone once asked me if we (the family) have considered going vegan and I told them that my family will eat anything I prepare (so they say) so it often depends on what I end up cooking.
Lately, I’ve been trying out different ways to cook tofu, as those of you who follow my blog can tell. 😀 My latest attempt is a dish I like to call Tofu ala Bistek. Bistek is the Filipino word for Beef Steak. The process is not quite the same but the end result is.
Tofu ala Bistek is best served with warm rice. Enjoy!
Notes:
- Cutting up the tofu into strips was my choice because I wanted to make sure the marinade would really seep in and I wanted it to look like meat slices.
- Using pancake syrup adds that little bit of sweetness the dish needs but you could try using sugar or honey, I suppose. Feel free to experiment!
- You can marinate the tofu for less than an hour, of course, but note that it will be more flavorful the longer you keep it in the marinade.
- I wouldn’t suggest marinating it overnight as the tofu might crumble or become too salty. I cannot be sure of this, of course, as I have never done that myself. 😀
Tofu ala Bistek
A new take on a Filipino standard.
Prep Time1 hour hr
Cook Time15 minutes mins
Course: Main Course
Cuisine: Chinese, Filipino
Keyword: filipino, tofu, vegan
Servings: 4
Calories: 142kcal
Author: Penny Angeles-Tan
- 500 grams firm tofu
- 1/3 cup light soy
- 1/3 cup rice vinegar
- 4 tsp pancake syrup
- 2 tsp sesame oil
- 4 cloves garlic, minced
- 1 tbsp ginger, minced or grated
- 1 onion, sliced into rings
- oil for frying You want to use a neutral oil like vegetable oil
Prepping
Place some paper towels on a cutting board and put the tofu on top of it and cover with another paper towel. If you have a cast-iron pan or any heavy pan, place the pan on top of the paper-covered tofu and just let it sit. The weight of the pan will press out the excess water while you work on the marinade.
In a bowl combine light soy, rice vinegar, syrup, sesame oil, garlic, and ginger. Mix and set aside.
Remove the heavy pan from on top of the tofu and remove the paper towels. You will notice that the towels are now wet from the water that was pressed out of the tofu.
Slice the tofu into thin slices (not too thin or it will just crumble!) and arrange them flat on a shallow dish or tray and pour the marinade on top. Cover and set aside for up to an hour. If you are like me and you tend to forget if the waiting time is long then cover the dish/tray and put it in the ref while it is marinating.
Time to cook
Place your skillet or shallow pan (a wok would also do nicely!) on the stove and heat it.
Place oil in the pan and once hot enough place the marinated tofu (only) flat and leave it alone to brown for a few minutes. Don't get tempted to move it around or the tofu might crumble. Allow it to brown and set. Do not throw away the marinade as you will need it later.
After a few minutes and the bottom is browned, gently flip each piece and brown that side, too. You can tell that the tofu is ready to flip when it starts to shrink a little and look puffy like a pillow.
When both sides are browned, take your sliced onion and scatter the rings on top. Pour the marinade over everything and cover for about a minute.
Your dish is now ready to be served and eaten. 🙂
If you try this recipe, please make sure to tag me on social media @slvrdlphn with the hashtag #slvrdlphnrecipes. Let me know, too, if you come up with a tweak that would make this dish different but still delicious!
by Penny Angeles-Tan | Jul 11, 2020 | Bon Appetit
Tokwa’t baboy is one of my favorite dishes. I could eat it for breakfast, lunch, and dinner. 😀 I have always wanted to make this myself but was never motivated enough to do so until now. I searched and found so many recipes online but I wanted something simple. For one thing, you can’t really find pig’s ears at the supermarket. In the end, I decided to follow the recipe for tokwa’t baboy of Chef Mira on Yummy.ph. As is my wont though, I confess, I did not follow it religiously, hehehe.
Here is my version of tokwa’t baby. Fyi, I also have this posted at hearthandhomebuddies.com.
Tokwa't Baboy
Tokwa't baboy is considered as Filipino comfort food. Some would contend that it makes for a great partner to an alcoholic beverage but I am of the mind that it is best served with steaming hot rice.
Course: Main Course
Cuisine: Filipino
Keyword: comfort food, pork, pulutan, tofu, tokwa
Author: Penny Angeles-Tan
- 1/2 kilo pork liempo
- salt
- pepper
- 5 cups water
- 1/2 kilo firm tofu (also called tokwa)
- coooking oil
- 1 1/2 cups cane vinegar
- 1/4 cup soy sauce (I prefer using light soy)
- 4 tbsps. sugar
- 1 medium onion, chopped fine
- 2 pieces long green chilis, sliced (siling pangsigang)
Rub the meat with salt and pepper and set aside for a few minutes.
Take a pot, place the seasoned meat in it, and pour in the water. Boil the meat to soften it. When you see brown stuff floating on top skim it off and throw it away. I keep a bowl handy just for this.
Once the water is reduced and the meat is softened remove the pot from the heat. Scoop out the meat and place it in a strainer to drain.
Place oil in a wok or frying pan and fry the tofu until golden brown. Do not overcook or the tofu will become too tough. Once cooked put the tofu on a paper towel to rest and drain.
Take out your chopping board and knife and cut up the meat into bite-sized pieces and set aside. Do the same for the tofu. When cutting the tofu, do not put too much pressure on the knife. Move the knife back and forth like a saw to cut through it gently. Both the meat and the tofu should be approximately the same size.
In another frying pan or wok combine the vinegar, light soy sauce, sugar, a dash of salt, and 1 cup of pork broth. This is the water used to boil the pork in. Simmer until the sugar is completely melted.
Add the onion, green chilis, and meat. Mix and simmer for a few minutes. Add the tofu, mix gently, then remove from heat. I would just turn off the stove.
Take a serving dish and scoop out the meat and tofu and arrange it. Pour the sauce on top.
Serve and enjoy!
If you like this recipe and will replicate it, take a pic and share it on Facebook or Instagram and don’t forget to tag me and use the hashtag #slvrdlphnrecipes
by Penny Angeles-Tan | Apr 20, 2020 | Bon Appetit
Bibingkang malagkit or kumot as my dad used to call it is a rice cake snack that my dad used to love. We would buy a small tray of 8 squares every week. My dad called it kumot because of the layer if coco-caramel on top.
Is it also called biko?
Bibingkang malagkit is also called Biko. The only difference that I can see is that Biko is brown and is often topped with latik instead of coco-caramel sauce. To achieve that brown color, replace the white sugar with brown sugar.
The search is over
one serving size served here as a dessert with a cup of coffee on the side
Our favorite kakanin seller has not been around since the quarantine and when I ordered from someone on Facebook who makes bibingkang malagkit Facebook I was very disappointed at what I received … it was 10×10, as promised but the rice part was barely a centimeter high and the coco-caramel topping was about as thick. It was so thin that the only way to enjoy it was to roll a slice into a log and THEN eating it. It was a waste of money. Therefore, I decided to try making it myself.
I looked at several recipes online and chose the one I thought I could work with and yet I still made changes because I wanted it to look just like the one dad liked.
It took quite some time to make and requires a lot of patience but if you keep at it, you will be quite happy with the end result.
Time to cook!
Below is my version of the bibingkang malagkit. I was surprised that it turned out pretty well … exactly the same as the one dad and I used to buy. Yey! Today I had it for dessert with my breakfast.
FYI, I love using a wok for most of my cooking so for this recipe I still used two woks … a big one for the kakanin and a small one for the sauce topping.
Biko or Bibingkang Malagkit
rice cake made of glutinous rice, sugar, salt, and coconut milk
Course: Breakfast, Dessert, Snack
Cuisine: Filipino
Keyword: bibingka, biko, filipino, rice cake
Servings: 24
Author: Penny Angeles-Tan
big wok
small wok
baking dish
oven
- 1 tbsp. butter for coating the baking dish
Kakanin
- 4 cups malagkit rice also known as glutinous rice
- 1,000 ml. gata coconut milk
- 1.5 cups water
- 1.5 cups sugar white or brown
- 1/4 tsp fine sea salt
Topping
- 200 ml. gata coconut milk
- 1 cup dark brown sugar
Preparing the kakanin
Place the rice in a bowl then wash and drain it. Place enough water to cover and soak for a few hours ... one hour at the very least, overnight at most. Note, that the longer you soak it, the better the rice will cook later.
When you are ready to cook, drain the rice and set aside.
Place the coconut milk and water in a saucepot, set the heat to medium and simmer.
Add the drained rice and stir often to be sure the rice does not burn along the sides of the pot. Continue to cook over medium heat and mixing until the rice has soaked up most of the liquid. Using a large wok makes it easier to mix.
Reduce the heat and add the white sugar and salt to the rice mixture and mix. Make sure the sugar and salt are completely mixed into the rice. You will notice that the rice where the sugar gets mixed in becomes shinier so keep mixing gently. This will take around 10 to 15 minutes, more or less.
Taste the rice every now and then to make sure it is cooked all the way through. You know you are done when the rice mixture is sticky and clumps but separates from the pot easily.
Preparing the coco-caramel sauce topping
Place the remaining 200 ml. coconut milk and the dark brown sugar in a saucepan.
Turn on the stove and mix until completely mixed and the sugar is dissolved.
Turn off the stove and allow to cool for 2 to 5 minutes.
Putting the dish together
Time to bake
Heat your oven to 350F. Some say to preheat before you start cooking but, personally, I usually wait until I am actually going to bake because I cannot predict how long the preparation would take and it would be a waste of gas (or electricity).
Once it has reached 350F place the prepared tray in the oven and bake for 1 hour. The sauce topping will bubble and thicken.
Set aside and allow to cool before serving.
Once your dish has cooled it will look like this:
by Penny Angeles-Tan | Mar 17, 2020 | Bon Appetit
I do most of the cooking at home and my most requested dish for everyday cooking is chicken and pork adobo. Here is my recipe. Warning, it is probably more work than most people want to put in but I promise you, the end result is super delish!
I actually combined 3 or 4 adobo recipes I found in our cookbooks here to come up with this version.
Chicken and Pork Adobo
A simple traditional Filipino dish that can be cooked in hundreds of ways ... each region (and possibly household) have their own way of making it.
Course: Main Course
Cuisine: Filipino
Keyword: adobo, chicken, comfort food, pork
Calories: 165kcal
Author: Penny Angeles-Tan
measuring cup
chopping board
2 pots
tongs or a slotted spoon
cooking spoon
large non-stick pan
- 1 kg pork cubed
- 1 kg chicken cut up
- coarse sea salt we use salt from Alaminos, Pangasinan
- water to cover
- 1 head garlic
- black pepper coarsely ground
- bay leaves (laurel)
- 3/4 cup regular vinegar
- 1/4 cup rice wine vinegar
- 1 cup light soy sauce
- 4 cups water
Preparation
Wash the pork and chicken separately, then place them in the pot. I recommend the pork below and the chicken on top.
Take a small fistful of salt (around 2 tbsps.) and sprinkle it on the meat then pour in enough water to cover.
Boil for 20 to 30 minutes. Make sure your pot is deep enough that it won't overflow. This will accomplish two things: a) it will soften the meat and b) it will remove that funky smell meat sometimes gets
Get a fat skimmer and skim off all the gunk (fat, etc.) that will float on the water. This usually looks like light brown bubbles or soap suds. DON'T MIX THE CONTENTS OF THE POT! That will just make the gunk mix back in and we are trying to remove it. Note: You don't have to wait until the 20 to 30 minutes are up to do this. I usually check every 5 minutes and remove what I can. This way, more gunk is removed.
Turn off the stove.
Cooking Phase 1
Take another pot put in the cracked garlic.
Using tongs or a slotted spoon lift out all the pieces of meat and put them in the pot containing the garlic.
Throw in the pepper and bay leaves.
Pour in the vinegar, rice wine vinegar, light soy sauce, and water. DO NOT MIX!
Turn on the stove and boil the pot for 30 minutes or until your nose tells you that the dish is cooked. This usually means it does not smell so "vinegary". You can cover the pot but make sure not to close the lid completely or place a wooden spoon across so that it won't overflow. At this point you will also notice that there is less water.
Taste and add salt or spices as you feel is needed.
Turn off the stove and let the adobo "sit". I like to just keep it in the pot covered properly to keep the household pests from getting to it first. But if you prefer, you can put it in the ref once it is cool. For the flavor to really seep in it is best to let it sit for 24 hours.
Cooking Phase 2
Take a large frying pan, preferably non-stick so you don't need oil. But if you have a regular one that is ok, too.
If using a regular frying pan, heat the pan then add oil. Once the oil is hot add the meat pieces and brown the meat. If using a non-stick pan, put the meat pieces in even if the pan is not yet hot. Turn on the stove to brown the meat.
Be careful when turning the meat to fry the other side. Since we pre-cooked the meat, it should be super soft and will likely shred ... unless your objective is adobo flakes, in which case, have at it! 🙂
Once all the meat is browned pour what sauce you have remaining over the meat to heat up.
Place in a bowl or serving platter and feed to your family.
I honestly do not know how many servings this recipe makes but it is a lot!
If you like this recipe and will replicate it, take a pic and share it on Facebook or Instagram and don’t forget to tag me and use the hashtag #slvrdlphnrecipes
by Penny Angeles-Tan | Feb 16, 2020 | Yummy Reviews
 For quite some time now samgyup has been the binge-eating go-to for many Filipinos in the metro. With so many such restaurants (sometimes a stone’s throw away from each other) it has become a challenge for foodies everywhere to find the perfect samgyup restaurant. I, myself, have tried more than a handful from north to south and it always interests me to discover what new thing or “uniqueness” each place has to offer.
Finding the place
There it is! This is the view from near the escalator.
Earlier this week I was invited to try out this fairly new place at Fisher Mall. I was told it was on the fourth floor which I thought was unusual. The fourth floor is the cinema level and there weren’t any restaurants there before (to my knowledge). You see, I live quite near to Fisher Mall and I find myself there at least once a week and yet I never noticed a restaurant (and a full meal restaurant at that!) on the fourth floor.
I later realized why … it was a part of the mall I rarely (if at all) go to because it goes beyond the VIP Cinema. The few times I’ve been to that part of the fourth floor is when I took the east escalator going up, but I didn’t bother to look across to that direction. So, finding Samgyup King is like finding hidden treasure.
What makes Samgyup King different?
There is ample space to walk in even while carrying dishes and trays.
Once you enter you will be surprised at how wide and spacious and deep it is. I certainly was! I am used to going to samgyup places where you are sitting so close to the people at the next table that you are bumping into each other every time you move. But not here, this is a breath of fresh air for claustrophobics like me.
By now everyone knows how samgyup works … you sit at a table with a round hot plate grill in the middle and you are served a multitude of side dishes for you to consume and raw meat that you will then cook yourself. But before we talk about the grill and the food, let us first talk about the service.
Self-Service
From the get-go, this already makes them different. No more waiting for the waiter to bring you the meat or side dishes you want. Just stand up, go to the side table and kitchen counter and just get what you want or need there. Do you need meat? Sauce? Side dishes? The only thing you will need to ask the waiter is the ramen, the milk tea, and the bill. 🙂
Are you counting your steps? If so, then your fitness tracker will be very happy. Every time you need something you will have to stand up and walk to the back of the restaurant then back to your table. Since you can only carry so many things at a time, this translates to several trips! In other words, you exercise while having lunch. 😀
Milk Tea
Every person is entitled to ONE milk tea order. Each milk tea order is served with black pearls in a tall glass with LED lights at the bottom (which are supposed to be turned on). You can choose from Hokkaido, Okinawa, Thai, or Taro Milk Tea, whichever is available at the time of your visit.
On any given day they only prepare two variants and when I was last there only the Thai and Taro Milk Teas were available. Luckily for me, what I wanted was the Thai Milk Tea, so it all worked out. Next time I hope they serve Okinawa or Hokkaido as I want to try those, too.
Side Dishes
Samgyup King offers side dishes just like the other places, but they offer some unique twists, too.
- Pickled radish and carrots – think atchara but bigger thin slices, not strings
- Marble potatoes
- Kimchi – according to Chef Raymond they make this fresh every day, but they don’t serve it until two days later to allow it to ferment.
- Egg rolls – sweetened scrambled eggs that are cooked thinly and rolled
- Rice – served in a giant rice cooker at the buffet table. Go ahead and have your fill!
- Ramen – think of it as a slightly spicy noodle soup. This was not at the buffet table, so you have to ask the waiter to serve it to you.
- Chicken wings – this is one of the most sought-after side dishes. It is absolutely delicious! And you have 4 different sauces to choose from, too. Some people have even professed that they are ok with just eating this
- Mojos – when I was there, I was able to try two flavors: cheese and sour cream and onion. I prefer sour cream and onion. 🙂
Food for cooking
Seasoned meat
Other places give seven varieties, eleven varieties, etc. In contrast, Samgyup King provides just five varieties of meat for grilling:
- Chicken bulgogi
- Pork bulgogi
- Beef bulgogi
- Salt and pepper pork
- Salt and pepper beef
Bulgogi is a sweet soy sauce so whatever meat is marinated in this would be sweet. Usually, the meat is sliced very thinly (sukiyaki cut) to make it easier to cook. The salt and pepper beef is cut just as thinly but is lightly seasoned with salt and pepper, as the name suggests.
The salt and pepper pork is thick-cut meat in comparison. Think of a pork steak that is lightly seasoned. To cook this properly you will need to cut up the meat when it is half-done.
I know, at first, it seems like this is not much. But wait, there’s more!
Skewers
This is one of the features that make Samgyup King different … their skewered dishes. I was really looking forward to this.
My family loves to order these freshly grilled barbeque style meats from the corner of our street whenever we don’t feel like cooking. These are what they are offering for rotisserie grilling:
- Pork barbeque
- Spicy pork barbeque
- Chicken barbeque
- Chicken wing barbeque
- Gizzard barbeque
- Pig intestine
- Chicken intestine
- Pork skin
- Pig ears
- Sausage
- Garlic longganiza
- Hamonado longganiza
- Sweet corn
My favorites of the bunch? The pork intestine and the pork skin. 😀 I ate a LOT of those 😀
Time to cook!
The Grill
At Samgyup King each table has a long rectangular open metal grill at its center with grooves along its side. This grill is filled with high-grade charcoal brisket for you to cook with. On one side the staff will place a flat rectangular hot plate for pan grilling. This is where we cook the meat samgyup style!
The Rotisserie or Rotating Grill
Remember those grooves I mentioned earlier? Those are for the special skewers they use for the rotisserie grill. Each skewer has a flower-like disk towards one end with spokes. The skewers are placed with the spoked disk aligned with the moving chain track located just beyond the grooves. This is what makes the skewers turn to make cooking the meat evenly. Just make sure to space the skewers so that they can turn easily as they cook. Crowding the skewers just means only one side will get cooked (and burn).
That being said, there really is no reason for you not to cook the skewers on the flat grill if you wanted to, it just won’t cook as evenly. What we did last time was we cooked it on the rotisserie first then when it was almost done, we removed them from the skewers and put them on the flat grill to make them a little crispy.
Do they have dessert?
Available flavors: sweet corn, milk, chocolate milk, chocolate mochi, and watermelon
The dessert is not indicated on the menu because it isn’t part of the cost of the buffet. However, a variety of ice cream is available at the freezer at the back for P20 to P25 pesos.
Is it expensive?
The regular price is P599 with an introductory price of P499. When the owner, Sir Willy, was asked about how long the introductory price will be implemented he candidly said he doesn’t know yet as they are playing it by ear.
Here’s some good news for those who are looking for additional discounts. Samgyup King is on Metrodeal! Get your vouchers on Metrodeal and instead of paying P499 you will only pay P399. What a deal!
It is important to note that they do honor senior citizen/PWD discounts. However, while they apply the 20% discount, they do not remove the 12% VAT anymore that is the norm for senior citizen/PWD discounts because, they said, their price is already discounted.
If you are a senior citizen or PWD I would recommend that you just buy a voucher in Metrodeal instead of using your SC/PWD discount because the Metrodeal offer is still cheaper by P20. I know many seniors who might find using an app like Metrodeal challenging so either ask your kids or grandkids to get the voucher for you if you want to save the P20 per senior citizen/PWD ID holder.
Recommendations
I reviewed them in 2018 and if I compare their offerings and service then and now, they have definitely improved a lot! If you would like to try this place out, here are some tips I would like to offer:
- Weekends (Friday, Saturday, and Sunday) are toxic, meaning the waiting list is long and the waiting time could take long, too. If you must go there on a weekend for lunch, try to be there when the mall opens at 11am so that you have a better opportunity of eating immediately/sooner. 3pm is also a good time as the lunch crowd has left (or are leaving).
- Weekdays (Monday to Thursday) are good days to visit.
- If you are a big group, then it is a good idea to make a reservation
- A minimum of two people per table is required to eat here.
- For extra savings, purchase vouchers from Metrodeal.
- Samgyup cooking is faster than rotisserie grill cooking. This is because the meats prepared for the flat grill are sliced quite thinly that they would definitely cook faster. Rotisserie grill cooking takes longer because the meat slices and the skewers hover over the heat source rather than direct contact. Just have patience, though. I promise it is worth the wait.
- If you are really hungry and the cooking is taking some time, then grab some chicken wings and mojos. They are ready to eat and available on the buffet table.
- DO NOT EAT THE MEAT RAW. If you get sick, the management is not answerable for your stupidity.
- When cooking, please make use of the hood provided over each table. This will lessen the smoke and food smells from clinging to your clothes and skin.
Bring your family, bring your friends, bring your co-workers! Come to a place that offers more than just samgyup. Go to Samgyup King.
Samgyup King is located on the 4th Floor of Fisher Mall on Quezon Avenue, Quezon City, with branches opening soon at Cubao and Novaliches.


 Every person is entitled to ONE milk tea order. Each milk tea order is served with black pearls in a tall glass with LED lights at the bottom (which are supposed to be turned on). You can choose from Hokkaido, Okinawa, Thai, or Taro Milk Tea, whichever is available at the time of your visit.
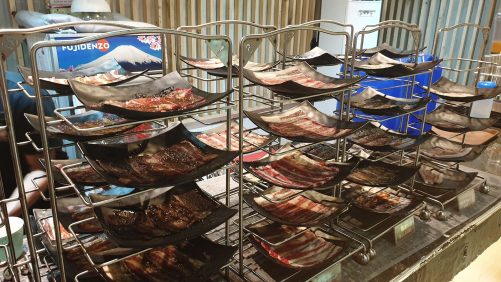

 At Samgyup King each table has a long rectangular open metal grill at its center with grooves along its side. This grill is filled with high-grade charcoal brisket for you to cook with. On one side the staff will place a flat rectangular hot plate for pan grilling. This is where we cook the meat samgyup style!


 Bring your family, bring your friends, bring your co-workers! Come to a place that offers more than just samgyup. Go to Samgyup King.


You must be logged in to post a comment.